Your shopping cart is currently empty.
Instrument Care and Feeding
Click on the title to view the information for your instrument.

The flute has three pieces:
- The body or main section is the longest piece, the one with all the keys;
- The foot joint is the shortest piece, with just a few keys;
- The head joint is the part you blow on to make a sound; it has no keys, just a hole.
Describing the flute is like describing yourself. When you put the flute together, the body is in the middle, the foot joint is at the bottom, and the head joint is at the top!
Assembly:
You should not touch the keys when assembling the flute, only when you play.
- Hold the body in your left hand at the end where there are no keys, where the brand name is. Hold it so the other end is pointing up, like you're holding a glass.
- Hold the head joint in your right hand in the middle. Notice that one end of the head joint is closed, and the other end is open. Hold it so that the open end is pointing up toward your left hand.
- Bring your left and right hands together and carefully insert the open end of the head joint into the open end of the body of the flute.
- DO NOT just push the two sections together. Instead, gently twist the head joint as you push it into the body and it will go together easily.
- The hole in the head joint should line up with keys on the body. If you pretend there's an imaginary line going all the way up and down the flute, it should pass right through the middle of the hole in the head joint and the center of all the keys on the body.
- Now that you've put the head joint and body together, continue to hold the body in the same place as before, but turn the instrument around in your left hand so that the head joint is pointing away from you.
- Hold the foot joint carefully in your right hand, right on the end where there are no keys.
- Point the other end toward the body and bring the two sections together, just like you did with the body and head joint. Remember to twist as well as push and they'll go together easier.
- The keys on the foot joint are held on by one long rod, or screw. When the foot joint is on correctly, the rod should point toward the middle of the keys on the body.
- Now you're ready to play!
After You Play
- Take the flute apart just the opposite of how you put it together, being sure not to touch any keys.
- It's important to always remove the moisture from inside the flute every time you're through playing. Most flutes come with a cleaning rod to help you do this. You'll also need a swab the size of a small handkerchief, made out of cotton, linen, silk, or microfiber.
- Feed a corner of the swab into the hole at the end of the cleaning rod and then pull it through a little more. Holding the rod pointing up in one hand and the other end of the swab in the other hand so it looks like a flag, pull lightly against the swab while you twirl the rod one turn so that it wraps some of the cloth around the rod. Then pull the rod up and over the top of the rod so that the end of the rod is covered, pull the cloth down the side of the rod, so that you can hold on to the other end of the cloth along with the base of the rod between your thumb and forefinger.
- Now pick up the head joint and poke the swab rod in all the way until it stops, then pull it out.
- Then pick up the foot joint (not by the keys!) and push the swab rod all through and back out again.
- Finally, pick up the body and swab it out twice, once from each end.
- Now you're ready to put the flute back in its case.
Cleaning and Polishing the Outside
- Use a cloth lightly moistened with rubbing alcohol to take finger prints off the keys and body. It also removes the oils from the hands, so do it before you use a polish cloth and your polishing will go faster.
- NEVER use a silver polish liquid or spray to shine your flute. It's okay to use a silver-polish cloth, but only on the tops of the keys and where it's easy to get to on the body. Stay FAR away from the pads when you're polishing your flute.
Helpful Hints and Reminders
- DO NOT hold the instrument by the keys at any time!
- NEVER use any lubricant on the joints. Instead, keep the sections wiped very clean inside and out where they go together.
- Keep your flute safe. It should only be "on your face or in the case!" Do not leave it on your chair, your music stand, the sofa, the table, the floor, or the piano. If a flute is dropped or sat on it can easily bend the body, an expensive repair.
- Don't carry or store anything inside the case other than the flute, especially the swab cloth. If the cloth's too big it can damage the flute when you try to close the case, and there's no sense in swabbing out the flute and then storing the wet swab on top of the flute. Suggestion: Tie the swab to the handle of your case, or if your flute has a case cover you can store it in-between the cover and the case.
- Always carry your case with the lid or top side of the case toward your body. This way, if the case were to unexpectedly open for any reason, you would have the chance to pull the case against your body to prevent the instrument from falling out. If the lid is facing away from you and the case opens there is no way for you to keep the instrument from falling out.
Whether the information is on a card inside the case, a label or an ID tag, make sure your instrument has identification on it showing that it belongs to you. Almost all band instruments have their own unique serial number on the body of the instrument so you shouldn't mark the instrument itself, but do have proof of ownership somewhere inside or on the case.

The clarinet has five basic pieces:
- The mouthpiece, with reed, ligature and cap;
- The barrel, (shaped like a . . . you guessed it . . . barrel);
- The upper, or left-hand section;
- The lower, or right-hand section;
- The bell, shaped, yup, like a bell!
Assembly
- The first step is to moisten the reed. The reed is the part that looks like it's made from a piece of bamboo. When the reed is placed correctly against the mouthpiece and you place the mouthpiece in your mouth and blow on it, the reed vibrates back and forth to make the sound.
- The reed is very fragile, so please be careful when you handle it. One end is trimmed and thinner at the tip and the other isn't. Pick up the reed holding it by the thick (or heel) end and place the thin end in your mouth on top of your tongue, then close your mouth. Be careful not to bite down on the reed, and keep it in your mouth while you assemble the instrument. By the time the clarinet is all together the reed will be moist enough to play when you put it on the mouthpiece.
- You'll notice that one end of the mouthpiece has a band or strip of cork around it. The right-hand section has one on the bottom end as well, and the left-hand section has one at each end. These strips of cork are called joint corks. They help hold the instrument together when you've assembled it.
- To make it easy to put the instrument together you have to lubricate the joint corks. The lubricant you'll use is called cork grease, and it usually comes in a tube that looks like ChapStick®. When a clarinet is new you should use cork grease every time you put the instrument together for the first week or two. After that, the corks will soak up some of the grease and you only need to use it once or twice a week.
- The cork grease does two things: it helps the instrument go together easier, and over a long period of time it keeps the corks from shrinking. When they shrink, the instrument feels wobbly when it's assembled and it may not even stay together. Therefore, even if the instrument goes together easily, still use cork grease from time to time.
- Back to the mouthpiece: put a light coat of grease on the cork; it doesn't take much at all but it should be put on all the way around the cork. While you're at it, put some on the two corks on the left-hand section and on the one cork on the right-hand- section.
- Now hold the mouthpiece in one hand and the barrel in the other and twist the two pieces all the way together. The barrel is narrower at one end than the other and the mouthpiece fits in the narrow end.
- The next step is to fit the wider end of the barrel onto the top of the left-hand section. Remember, this section is shorter then the right-hand section.
- The top of the section is the end with fewer keys on it; the brand name of the instrument is also usually visible near the top. Near the bottom end you'll notice two round keys close to each other that can move up and down where there are open holes in the body. This is the front side of the left-hand section. Hold the left-hand section here with your left hand, encircling it with your hand with the top of the section pointing upward. It's similar to holding a banana as you get ready to peel it.
- Never hold the left-hand section up at the top because it's too easy to bend the keys when you put the barrel on.
- Now you can pick up the barrel with the mouthpiece in it and twist the barrel onto the top of the left-hand section.
- The mouthpiece has an opening it; a tall rectangular opening that's called the window.
- The back side of the left-hand section has a metal hole in the body with a round key that sits on top of it, and just above this is a long key that points up toward the mouthpiece.
- If we draw an imaginary line through the middle of this long key (the register key) it should go through the middle of the opening in the mouthpiece. When these two things line up, the barrel and mouthpiece are placed correctly on the left-hand section.
- Keep these parts in your left hand while you pick up the right-hand section.
- On the right-hand section you'll notice a key with three open rings on it that each encircle a hole in the body of the instrument. This is the top and the front of the right-hand section. Near the other or bottom end you'll see a key that you can move up and down over a hole just by touching it, and a little further up you can see another one. There is a space in-between these two keys where you can place your right-hand and hold the section. Hold it in your right hand so that the top end is pointing up and you can see the key with the three rings.
- When you place the bottom part of the left-hand section into the top half of the right-hand section, the front of the left-hand section (with the two round keys) wants to be in line with the front of the right-hand section with the three round keys. With a few back and forth twists of the left and right hands you should be able to bring the two sections together.
- If you examine where the two sections come together you should see a key extending down from the left-hand section that looks like it should be directly on top of a key coming up from the right-hand section. These are called the bridge keys, the connecting keys, or the one and one keys. The upper one connects to one of the keys with a ring and the lower one connects to the key with three rings.
- When you are grasping the left-hand section in preparation to join it with right-hand section, it is crucial that you hold it in such a manner that the upper bridge key is raised, which automatically happens when you press down the part of the key that has the ring. It needs to be raised so that when the two sections come together it will come to rest on top of the lower bridge key. If it isn't raised, then the two connecting or bridge keys will run into each other.
- These two sections are together correctly when the upper bridge key is lined up exactly in top of the lower bridge key.
- Now all you have left is the bell, which you twist on with the left hand since you are still holding the right-hand section in your right hand.
Putting On the Reed
- All this time you've had the reed in your mouth. Your next step is to take the ligature, the metal clamp that holds the reed in place on the mouthpiece, and place it carefully over the mouthpiece so that when the window of the mouthpiece is facing you, the screws of the ligature are pointing to the right.
- Then you take the reed out of your mouth an slip it heel or thick end first into the space between the ligature and the mouthpiece. The thin tip of the reed wants to be even with the tip of the mouthpiece; no higher, no lower. The ligature wants to be low enough on the mouthpiece that it doesn't cover up any portion of the reed that has been shaved or cut to make it thinner. When you have the reed in this position you can then tighten the ligature screws just enough to keep the reed in place. Now you're ready to play the clarinet!
After You Play
- When you're through playing, the first thing you do is remove the reed. It's very delicate and easy to break, so it's the last thing you put on the instrument when you're assembling it and the first thing you take off when you're taking the instrument apart to put away when you're through playing.
- Carefully wipe the moisture off the reed and place it in a protective container, preferably a reed guard. DO NOT leave it on the mouthpiece, because it can't dry out well, it can warp, and it could mold.
- Next, remove the ligature and then the mouthpiece, setting them to the side for the time being. The inside of the instrument will be wet from playing, and now you need to pull a swab through the clarinet to remove the moisture.
- The swab we like the most is called a handkerchief swab, obviously because it looks like one. You'll notice that one corner of the swab has a pull string or cord attached to it that is perhaps a foot long, with a small weight sewn into the fabric at the other end of it.
- IMPORTANT: The first step when you use the handkerchief swab is to unfurl it, which means to open it up completely. If the swab has been folded or wadded up in the case it can be all bunched up, and won't fit when you try to pull it through the inside of the instrument. Grab one corner in one hand and the opposite corner in the other hand and pull the swab open before you use it to make sure it's not folded over on itself anywhere.
- If you don't do this first, the swab could get stuck inside the clarinet, especially in the left-hand section. If the swab ever does get stuck, don't try to get it out your self, and don't let your parents try either. You should take it to a music store that offers repair and have the repair tech remove it because if you or your parents try to remove it, the inside of the clarinet could be damaged.
- Now it's time for you to swab! Hold the clarinet in one hand and with the other hand drop the weighted end of the pull cord into the top of the barrel and feed the string in behind it so the weighted end drops down toward the bell.
- When you can see the weighted end of the swab start to protrude out of the bell at the other end of the clarinet then you can grab it and pull the entire swab all the way through. Then take the swab and do the same thing, except this time drop the weighted end down the bell and pull it through and out from the barrel end.
- Wipe the outside off occasionally with a soft, clean cotton cloth. Never use a silver polish cloth, rubbing alcohol or any other liquid on the outside of the instrument.
- Now that the instrument is clean and dry, you can reverse the order in which you assembled the clarinet and take it apart, placing each part in its appropriate place in the case.
- NEVER leave the instrument together outside the case. The joint corks stay compressed when the instrument is together and they need a chance to expand back out so the fit will be snug the next time you assemble your clarinet. Your instrument is also safer when it's in the case.
- Hold the mouthpiece upside down and carefully drop the weighted end of the handkerchief swab pull cord into the mouthpiece and then pull it through the top end. NEVER drop the weight through the window, the opening where the reed goes, only from the bottom.
Helpful Hints and Reminders
- Loosely wad your handkerchief swab up when you're through swabbing out your clarinet and store it in the bell.
- Always have at least two reeds with you, preferably three or four.
- Once a week wipe off the excess cork grease that may have built up around the joint corks.
- Keep your clarinet safe. It should only be "on your face or in the case!" Do not leave it on your chair, your music stand, the sofa, the table, the floor, or the piano. If a clarinet is dropped or sat on it can easily break in half, an expensive repair.
- Always carry your case with the lid or top side of the case toward your body. This way, if the case were to unexpectedly open for any reason, you would have the chance to pull the case against your body to prevent the instrument from falling out. If the lid is facing away from you and the case opens there is no way for you to keep the instrument from falling out.
- Whether the information is on a card inside the case, a label or an ID tag, make sure your instrument has identification on it showing that it belongs to you. Almost all band instruments have their own unique serial number on the body of the instrument so you shouldn't mark the instrument itself, but do have proof of ownership somewhere inside or on the case.

The saxophone has three basic pieces:
- The mouthpiece, with reed, ligature and cap;
- The neck;
- The body.
Assembly:
- The first step is to moisten the reed. The reed is the part that looks like it's made from a piece of bamboo. When the reed is placed correctly against the mouthpiece and you place the mouthpiece in your mouth and blow on it, the reed vibrates back and forth to make the sound.
- The reed is very fragile, so please be careful when you handle it. One end is trimmed and thinner at the tip and the other isn't. Pick up the reed holding it by the thick (or heel) end and place the thin end in your mouth on top of your tongue, then close your mouth. Be careful not to bite down on the reed, and keep it in your mouth while you continue with the assembly of the instrument.
- The next step is to pick up the neck and hold it in your left hand while you put a light coat of cork grease on the cork where the mouthpiece will go. When holding the neck, don't hold it near either end. You don't want to be touching the part of the key that has a small leather pad in it and you don't want to be touching the opposite end where the key loops around the neck. Instead, you want to hold it like you might hold a toy gun, with your thumb and forefingers wrapped around the middle of the neck where the key is attached. When you're holding it like this you can squeeze hard if you need to and you can't bend the key or tear the leather pad.
- After you've applied the light coat of cork grease then hold the mouthpiece in your right hand and slowly twist it onto the cork. Twist it clockwise and counter-clockwise as you push in onto the cork. The mouthpiece is on the correct amount for a beginner when almost all of the cork is covered up and hidden from sight. At this time the side of the mouthpiece that has an opening should be on the bottom side of the neck, and the end of the key, (the upper octave key), the end with the leather pad, is on the top.
Putting On the Reed
- All this time you've had the reed in your mouth. Your next step is to take the ligature, the metal clamp that holds the reed in place on the mouthpiece, and place it carefully over the mouthpiece so that when the window of the mouthpiece is facing you, the screws of the ligature are pointing to the right.
- Then take the reed out of your mouth and slip it heel or thick end first into the space between the ligature and the mouthpiece. The thin tip of the reed wants to be even with the tip of the mouthpiece; no higher, no lower. The ligature wants to be low enough on the mouthpiece so that it doesn't cover up any portion of the reed that has been shaved or cut to make it thinner. When you have the reed in this position you can then tighten the ligature screws just enough to keep the reed in place.
- Now you can set the neck and mouthpiece down for just a moment. If you like being extra careful, first carefully place the mouthpiece cap over the mouthpiece and reed; that will protect them against an accidental bump.
- Then take the neck strap and place it over your head. If there's not enough room to slip your head through, then with one hand grasp the strap by the end farthest from the hook, and with the other grasp the part that looks like a buckle where the two sides of the strap are pulled into one piece and slide the buckle away from your other hand, which will make the looped part you place over your head larger in diameter.
- Next, it's time to pick up the body of the saxophone, which you do with your right hand by placing your fingers inside the bell and your thumb outside. By holding it by the end of the bell you don't touch any of the keys, meaning you can't accidentally bend them during assembly.
- While you're holding the body of the sax with one hand, pick up the neck and mouthpiece with your other hand and insert the larger part of the neck into the top of the sax. The neck and mouthpiece should be pointing toward you when the bell is pointing away, and the mouthpiece and the strap ring should be more or less in vertical alignment with each other.
- With the bell pointing away from you, you'll notice a small ring in the middle of the body of the saxophone on the side facing toward you. Holding the sax in your right hand by the bell, use your left hand to grasp the dangling end of the sax strap which has a hook on it, and attach that to the strap ring. If it feels more comfortable, it's okay to hold the bell with the left hand and hook up the strap with the right. Now you're ready to play the saxophone!
After You Play
- When you're through playing, the first thing you do is remove the neck, setting it down carefully where it's safe from being bumped.
- Next, unhook the neck strap. Now you're ready to swab the moisture out of the inside of the sax.
- First, holding the instrument as though you were playing it, tip the bell toward the floor so that any excess moisture that may have accumulated at the bottom of the horn can drip out the end of the bell.
- If you're using a Pad Saver® for the body of the sax, hold the bell of the sax with your left hand against your body, with the top of the sax pointing to your right. Hold the Pad Saver® at the big end (the bottom), not the small end (the top), and feed it bit by bit into the body of the sax. Do NOT try to push it all the way in at once with one big push from the small end. The swab can bend (it is braided wire on the inside) and once it's bent it's hard to straighten, meaning that from then on out it will be harder to push in and pull out of the body of the sax.
- If you're using a pull through swab for the body of the sax, there are two basic types. One has a square of chamois or synthetic chamois and the other a much larger and longer piece of fabric (cotton, linen or silk). If you have the second kind, be sure to first grasp the swab with both hands and pull it apart to make sure it is completely unfurled before you try to pull it through the horn. It's very easy for a bunched up swab to get stuck inside the horn.
- Hold the bell of the sax with your left hand while you drop the weighted end of the string or cord attached to the swab down into the bell, followed by the rest of the swab. Tilt the sax directly backwards and then down so the weight and string drop into and down the main body tube and then come out the neck tenon receiver where the neck attaches. Grab a hold of the weight with your right hand and continue to hold the bell of the sax with your left hand. Hold the sax against your body, with the top of the sax pointing to your right, and slowly pull the swab all the way through the body of the sax and out the end. Repeat the process if you've been playing for a long period of time or if there appears to be moisture left in the instrument after the first time you pull the swab through.
- Next, pick up the neck, remove the reed and carefully wipe the moisture off and place it in a protective container, preferably a reed guard. DO NOT leave it on the mouthpiece, because it can't dry out well, it can warp, and it could mold.
- Then remove the ligature, followed by the mouthpiece, being careful to hold the neck by the middle, just as you did when you were assembling the instrument.
- While the body of the sax is the most important part to swab out, it's preferable to swab the neck out as well. One way is to insert a Neck Saver® into the neck and leave it; the other way is to pull a swab through; a clarinet handkerchief swab made of linen or cotton (not one of the chamois ones) works very well for this. Just like with the body swab, grasp the swab with both hands and pull it apart to make sure it is completely unfurled. Then drop the weighted end through the neck tenon or bottom of the neck, let it drop through the other end, grasp the weight and pull the swab all the way through.
- If you use a clarinet handkerchief swab for the neck, you can also use it for the mouthpiece, dropping the weight through the bottom and pulling the swab through and out the window where the reed is placed.
- If you don't use a swab for the mouthpiece, once a week you should immerse it in lukewarm water and carefully clean the inside with a mouthpiece brush, being very careful not to scratch any part of the mouthpiece with the brush.
Cleaning and Polishing the Outside
- Just use a clean dry cloth to keep the outside of the instrument clean. There are lacquer polish cloths available that are okay to use which are treated with a wax that cleans and shines and won't hurt the finish of the sax. If you are careful, you can also spray a polish such as Pledge® lightly on a cloth and then use the cloth to polish and remove any stubborn stains on the body of the horn.
Helpful Hints and Reminders
- If you are using a large pull-through swab on the body or a handkerchief swab on the neck, wad the swab up loosely when you're through swabbing out and store it in the accessory compartment in the case.
- Always have at least two reeds with you, preferably three or four.
- When you are placing the horn back in the case do not store your band method book on top of the instrument. Most saxes and sax cases are designed these days so that padded inside of the lid comes right down on top of the sax, leaving no room for a book. Forcing a book to fit by pushing down on the lid to close it can damage the instrument.
- Keep your saxophone safe. It should only be "on your face or in the case!" Do not leave it on your chair, the sofa, the table, the floor, or the piano. If a sax is dropped it can cause extensive damage and expensive repair.
- Always carry your case with the lid or top side of the case toward your body. This way, if the case were to unexpectedly open for any reason, you would have the chance to pull the case against your body to prevent the instrument from falling out. If the lid is facing away from you and the case opens there is no way for you to keep the instrument from falling out.
- Whether the information is on a card inside the case, a label or an ID tag, make sure your instrument has identification on it showing that it belongs to you. Almost all band instruments have their own unique serial number on the body of the instrument so you shouldn't mark the instrument itself, but do have proof of ownership somewhere inside or on the case.
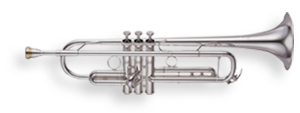
The trumpet has two basic pieces:
- The mouthpiece;
- The instrument.
The instrument is composed of the valves, the slides, and the body of the horn.
Assembly
- The basic assembly of the trumpet is quite easy and consists simply of placing the mouthpiece into the mouthpiece receiver on the instrument. Take care not to twist the mouthpiece as you insert it into the receiver; you also don't want to push it in too hard, tap or bang on it or the mouthpiece might get stuck.
The Valves
- There are three valves, or pistons, on a trumpet; the first, second and third. The first valve is closest to the player holding the horn and the third valve is closest to the bell. The second valve is in-between the first and third.
- At the top of each valve is the finger button, which is screwed onto the valve stem. Next is the top valve cap, which keeps the valve in place in its correct part of the valve casing on the body. Underneath the top valve cap is the spring barrel which holds the spring that allows the valve to spring back up when it has been pushed down. Underneath the bottom of the spring and sticking out of two slots in the side of the spring barrel is the valve guide, which is usually made out of white plastic. This important part of the valve keeps the valve in the correct position when it's in the valve casing. The spring barrel is attached to the actual valve itself. Each valve has three holes or passageways going through it, with one port at each end of each hole. With the help of the valve guides these holes line up with the different tubes attached to the valve casing on the body so that the air or sound can pass through the trumpet correctly. At the bottom of each section of the valve casing is a bottom valve cap that protects the bottom of the valve and prevents oil from dripping out.
- While it looks like it would be fun to take all the valves apart and put them back together, it's best not to do so. If you have taken a valve out of the trumpet, be careful not to drop or bang it because it can be bent quite easily. Also, if you set one down, be careful to put it in a place where it cannot roll or be accidentally bumped. Most valves have a number on the spring barrel so you can tell whether they're number one, two or three.
Oiling the Valves
- It is best to choose a time to oil the valves when there is not a lot of activity around you. For example, it might be better to oil them at home before band instead of right before band when there are a lot of other students running around who could bump into you. If you happen to drop a valve it will probably get bent and not work, so you need to be careful when you do this.
- You only need to oil one valve at a time. First remove the cap from your bottle of valve oil and place it nearby where you can reach it. Holding the trumpet in your left hand with your fingers wrapped around the valve casing, unscrew the top valve cap counter-clockwise and pull the valve out far enough so that you can see the actual valve itself. Holding the trumpet so that the valve stays pulled out but won't fall out, place a couple drops of oil on the valve, then push the valve back into the valve casing. Without pressing down the finger button, twirl the valve clockwise or counter-clockwise until you feel the valve stop and the valve guide click into its slot inside the valve casing. Carefully thread the top valve cap clockwise, push the valve up and down a few times to distribute the oil, and you're all done and ready to do the next one.
- The valves don't need to be oiled every time you play, but you should oil them two or three times a week or whenever they feel sluggish.
The Slides
- There are four slides on a trumpet. Each valve has a corresponding slide, so there is a first slide, a second slide and a third slide. The first slide is connected to the first valve casing and points toward the player. The second slide is connected to the second valve casing on the right-hand side of the horn as the player holds it. The third slide is connected to the third valve casing and points in the same direction as the bell. The fourth or final slide is the tuning slide. It is larger than the other three and is connected to the mouthpipe and the third valve casing. The mouthpipe, or leadpipe as it is sometimes called, is the long, straight tube the runs along the upper right side of the trumpet as the player holds it. The part of the mouthpipe closest to the player ends in the mouthpiece receiver where the mouthpiece goes. The other end of the mouthpipe ends in the tube that accepts the upper part of the tuning slide. Near this end of the mouthpipe, on top, is the finger hook for the right little finger.
- On the tuning slide and usually on the third slide as well there is a water key near the bottom of the curved part, commonly called a spit valve. Playing the trumpet stimulates the salivary glands and some saliva inevitably builds up inside the instrument and starts to make a gurgling sound. When this happens we need to release the saliva by opening the water keys and blowing on the mouthpiece. We don't need to buzz like we do when we play the trumpet; we just need to blow. If there is an accumulation of water in the third slide, we need to hold the third valve down when we blow and have the third slide water key open, otherwise the air doesn't go through the third slide.
- There's often some valve oil which can stain a rug or carpet mixed in with the saliva so it's important to keep in mind whose floor we're emptying our water keys on. On the linoleum in the band room is probably okay, but you might want to think twice before emptying the water keys on your mom's new carpet. Some players will have an old towel or tee shirt to place on the floor just for this purpose.
Cleaning the Trumpet
- Like it or not, sooner or later there will be some debris that builds up inside your trumpet that needs to be cleaned out. Unlike the flute, clarinet or saxophone, you can't pull a swab through the trumpet once you're through playing and clean everything all out. With regular playing you should give your trumpet a bath about once a month. Once you get used to doing it the whole process will only take about fifteen to twenty minutes.
- In order to clean the trumpet thoroughly you have to give it a bath. This can be done in the bath tub, the kitchen sink or another wash basin. It's important to have a flat surface nearby where you can lay a towel out flat. You'll use this towel to set the different parts of the trumpet on when you take it apart to clean it.
- Here's what you'll need to have to clean the trumpet:
Mouthpiece brush
Flexible bore brush (snake)
Valve casing swab rod
Valve oil
Slide grease
Paper towels
Hand towels (2)
Cotton cloth (no synthetic) tight weave, like an old dish towel
Mild soap like Ivory&#reg; dish soap - The first step is to disassemble the horn. Set the mouthpiece to one side on the towel you've laid out flat. Unscrew the top valves caps one at a time, take the valves out and place them in order 1-2-3 on the towel. Then unscrew the bottom valve caps and place them in order underneath the valves. Finally, remove the first, second, third and tuning slides and place them in order to the side of the valves.
- Next take a sheet of paper towel and carefully wipe any oil off the valves. Then pick up each slide and wipe any slide grease off the tubes. If the body of the trumpet has any inner slide tubes wipe any grease of these also.
- Now take a corner of the cotton towel and feed it through the eye of the valve casing swab rod and pull a small amount of cloth through. Holding the rod in your right hand with the end pointing up, hold the cloth out to the left like a flag. Twirl the rod one half turn counter-clockwise so the cloth starts to wrap around the rod. Then pull the cloth up and over the top of the rod and pull it down the other side. This should leave the end of the rod covered in cloth and the cloth should have a slight bulge to it at the tip of the rod. Pull the fabric down the side of the rod and with the round bottom of the rod planted firmly in the palm of your right hand, grasp the rod with your thumb and fingers so that the cloth is taut. Pick up the trumpet with your left hand by the valve casing and use the rod to swab out the inside of each of the valve casings. The cloth on the rod should fit snugly into the valve casing; snug enough so you have to push a little to fit it in, but not so tight you have to fight it or so loose it doesn't grab the inside of the casing. If the swab is too loose, lift the cloth back over the top and twirl the rod around a little more than half a turn and that will make the head of the swab bigger. If it's too tight then lift the cloth up and un-twirl it just a bit and that should make it fit easier.
- After all the old lubricant has been removed, we can wash the trumpet. Fill the sink or tub up with lukewarm water (not hot), deep enough so that the body of the trumpet can be submerged under water. Mix in some soap, just like you were going to do the dishes. First, take the mouthpiece brush and clean out the mouthpiece in the water, running the brush up the bottom, or shank end, of the mouthpiece. Rinse and set aside to dry.
- Next, immerse the body of the trumpet in the water and run the flexible bore brush through all the slide tubing and the mouthpipe. You can push the brush down the bell but be looking down the first valve casing and stop when the brush gets that far.
- Now that the body has been cleaned it needs to be rinsed. Run lukewarm water all the way through all the tuning until the water comes out clear and then find a place where you can set the trumpet down on its bell so it can drain but it's in no danger of falling over.
- Clean the slides next in the soapy water. Run the brush all the way through the tuning slide but only down to the end and back of both sides of the three valve slides. Rinse all four and stand them upside down in a place they can safely drain.
- Finally, take each valve one at a time and just hold the actual valve, the gray part with the three holes and six ports under the water and very carefully use the mouthpiece brush to clean out any debris in the ports. Rinse the valves off and stand them straight up in a safe place where they can't fall over. If the bottom valve caps are dirty this is the time to wash them out as well.
- Take your second towel and wipe all the parts dry and then lay them out in the same order as when you took the trumpet apart. Then pick the body of the trumpet up and swab out the valve casing once more, using a clean part of the cotton cloth.
- Now it's time to reassemble the horn, and we'll start with the slides. Rub a thin coat of slide grease on the inner slide tubes of the first slide and then push the slide onto the body of the horn, then do the same with the second, third and tuning slides. Wipe off the little bit of excess grease that you'll find after you've pushed each slide in.
- Next, pick up the first valve and place it part way into the first valve casing and place a few drops of valve oil on the valve itself and then push it the rest of the way in and tighten the top valve cap. Then do the dame for the second and third valves. At this point pick up the trumpet and work all the valves up and down for a short time and see how they feel. If they feel good then it's fine; if they feel a little slow then you'll have to take them out again and swab the valve casings out once more.
- Once you're happy with the way the valves feel, you can put the bottom valve caps back on. It's a good idea to put a small amount of slide grease on the threads of the bottom valve caps. Without the grease the caps could be hard to get off the next time you take the trumpet apart.
Cleaning and Polishing the Outside
- Just use a clean dry cloth to keep the outside of the instrument clean. There are lacquer polish cloths available that are okay to use which are treated with a wax that cleans and shines and won't hurt the finish of the trumpet. If you are careful, you can also spray a polish such as Pledge&#reg; lightly on a cloth and then use the cloth to polish and remove any stubborn stains on the body of the horn.
- If the instrument is silver-plated instead of brass-lacquered, you can use a silver polish cloth to keep the outside shiny. Before you polish a silver horn, especially if you haven't given it a bath recently, take the time to wipe the outside off with a cloth lightly dampened with rubbing alcohol. This removes the oils of the perspiration from your hands and any dirt that might be on the surface and makes the actual polishing go a lot quicker.
Helpful Hints and Reminders
- Pliers and trumpets don't go together – ever! If your mouthpiece happens to get stuck for any reason, DO NOT use pliers to try to get it loose, and just as important, DO NOT let your dad try it either. Depending on how stuck it is, using the pliers can scratch and damage the mouthpiece at the very least. In worse cases the mouthpiece won't free up but the mouthpipe will start to break away off the body of the trumpet. In the worst cases the person trying to “unstuck” the mouthpiece can pull the entire mouthpipe off the body of the trumpet, and the mouthpiece is still stuck!
- If and when the mouthpiece gets stuck, first ask your band director for help. Most band directors have a tool called a mouthpiece puller that can remove a stuck mouthpiece quickly and easily without damaging the mouthpiece or the trumpet. If the band director cannot help you, then take your trumpet to your local band instrument store and ask for their help.
- When you're holding or playing the trumpet, don't put your right little finger, the “pinky” finger, in the finger hook on the mouthpipe. Instead, place your little finger on top of the hook. In order to do this you have to raise your entire hand just a little bit, and what it does is gives your first, second and third fingers a better angle to push the valves down.
- When your little finger is in the hook your other fingers are fairly flat when they touch the valves. It's hard to push the valves straight down in this position; instead they get pushed partly sideways at the same time they are being pressed down. When the little finger rests on top of the finger hook then the other fingers have some arch to them and can push the valves down straight every time. This makes the valves work better and faster.
- So why is the finger hook there, you ask? You need to use the finger hook at times when you have to hold the trumpet with just your right hand. This could be when you need to keep playing while you turn a page of music, or it could be when you're playing and you need to put a mute in the trumpet or take one out. With your little finger in the hook you can still work the valves while you hold the trumpet with just your right hand.
- When you are placing the horn back in the case do not store your band method book on top of the instrument. Most trumpets and trumpet cases are designed these days so that padded inside of the lid comes right down on top of the trumpet, leaving no room for a book. Forcing a book to fit by pushing down on the lid to close it can damage the instrument.
- Keep your trumpet safe. It should only be "on your face or in the case!" Do not leave it on your chair, the sofa, the table, the floor, or the piano. If a trumpet is dropped it can cause extensive damage and expensive repair.
- Always carry your case with the lid or top side of the case toward your body. This way, if the case were to unexpectedly open for any reason, you would have the chance to pull the case against your body to prevent the instrument from falling out. If the lid is facing away from you and the case opens there is no way for you to keep the instrument from falling out.
- Whether the information is on a card inside the case, a label or an ID tag, make sure your instrument has identification on it showing that it belongs to you. Almost all band instruments have their own unique serial number on the body of the instrument so you shouldn't mark the instrument itself, but do have proof of ownership somewhere inside or on the case.
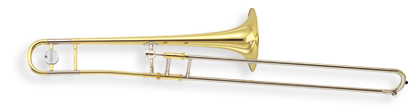
The trombone has three basic pieces:
- The mouthpiece;
- The hand slide;
- The bell.
Assembly
- First let’s spend a moment talking about the hand slide. It comes in two pieces, the inner slide and the outer slide. As you might guess, the inner slide fits mostly inside the outer slide. The hand slide is the heart of the trombone and is very easy to damage, so we have to be careful with it at all times. A small dent anywhere in the outer slide can make the trombone harder to play.
- You’ll notice that on one side of the outer slide there is a water key, commonly called a spit valve, near the bottom. The tube on this side of the outer slide is called the lower outside slide tube. The other side, with no water key, is called the upper outside slide tube.
- These two tubes, the lower and upper outside slide tubes, are joined at the bottom by the curved piece of tubing called the hand slide crook. The water key is attached to the hand slide crook on the corner where the crook connects to the lower outside slide tube.
- The outer slide tubes are joined near the top of the tubes by the outer hand slide brace.
- At the top of the upper outside slide tube, very near the outer hand slide brace, is a little strip of metal attached to the tube called the slide lock lug. It’s shaped a little bit like a comma, lying on its side. This is part of a system on the hand slide that keeps the inner and outer slides safely locked together when we don’t want them to move. The other part is on the inner slide.
- Just like the outer slide, there is an upper inside slide tube and a lower inside slide tube. Each tube fits inside one side of the inner hand slide brace, one on the upper and one on the lower.
- Notice that the top of one of the inner slide tubes is taller than the other and ends in a taper. This is the lower inside slide tube. The tapered portion above the inner hand slide brace is the part that connects the hand slide to the bell.
- The other tube then is obviously the upper inside slide tube. The top of this tube is where the mouthpiece goes. A little further down, just below the cross bar of the inner hand slide brace, is the other half of the slide lock assembly. The bottom of the inner hand slide brace on this side has a circular, cylindrical piece that is threaded and can be turned clockwise or counter-clockwise. Quite often there is a little piece of metal shaped like an upside down comma attached to the bottom of this piece.
- Therefore, the lower inside slide tube, the one that’s longer at the top, goes in the lower outside slide tube, the one with the water key at the bottom.
- The upper inside slide tube, the one that takes the mouthpiece and has the slide lock, goes in the upper outside slide tube, the one with the slide lock lug near the top and no water key at the bottom.
- When you place the inner hand slide inside the outer hand slide be sure to have the slide lock “on” whenever you’re not playing by turning or spinning the slide lock counter-clockwise until it slips over the slide lock lug to hold the outer slide in place.
Now we’re ready to assemble the trombone!
- The bell section starts with the bell, goes up and around and part way back down toward the bell, where it ends in the slide receiver and is secured to the long, straight part of the bell with the bell brace. At this end of the bell we can see a circular, cylindrical piece called a lock nut over the slide receiver that can be turned clockwise or counter-clockwise. The lock nut is used to secure the bell to the hand slide.
- To assemble the trombone we need to hold the bell in our left hand right by the lock nut. Hold the bell so it is facing toward the floor.
- Pick up the hand slide in your right hand and hold the lower outside slide tube just below the outer hand slide brace. Hold the hand slide straight up and down so that the end with the water key is close to the floor.
- Bring the bell and the hand slide together and insert the tapered top of the lower inside slide tube into the slide receiver. Although you are holding the trombone vertically at this point, the bell should be on the far side of your left hand, straight in front of you, and the hand slide should be at a right angle, with the upper inside slide tube where the mouthpiece goes directly to the right of the lower inner slide tube where it connects to the bell. When you have it positioned correctly you can then turn the lock nut on the slide receiver clockwise until it’s snug and tight.
- Finally, gently place the mouthpiece into the mouthpiece receiver and you’re ready to play!
Cleaning the Trombone
- Like it or not, sooner or later there will be some debris that builds up inside your trombone that needs to be cleaned out. Unlike the flute, clarinet or saxophone, you can’t pull a swab through the trombone once you’re through playing and clean everything all out. With regular playing you should give your trombone a bath about once a month. Once you get used to doing it the whole process will only take about fifteen minutes.
- In order to clean the trombone thoroughly you have to give it a bath. This can be done most easily in the bath tub or a large wash basin. It’s important to have a flat surface nearby where you can lay a towel out flat. You’ll use this towel to set the different parts of the trombone on when you take it apart to clean it.
- Here’s what you’ll need to have to clean the trombone:
Mouthpiece brush
Flexible bore brush (snake)
Hand slide swab rod
Slide oil or cream
Slide grease
Paper towels
Hand towels (2)
Cotton cloth (no synthetic) tight weave, details below
Mild soap like Ivory® dish soap - The first step is to disassemble the horn. Set the mouthpiece to one side on the towel you’ve laid out flat. Then place the bell on the towel bell down so it’s standing up.
- The curved part of the bell section is called the tuning slide and it needs to be removed for cleaning. Notice that there is a cross brace connecting both sides of the tuning slide and another cross brace just below it. The third cross brace on the bell is further down, where the mouthpiece receiver is connected to the bell.
- Grasp each side of the bell in-between these two braces and then position your thumbs so they can push up against the upper cross brace, the one that is part of the tuning slide. Push the tuning slide upward so that it extends further out than before.
- Change your hand positions so that your left hand is holding the bell by the middle of the cross brace just below the tuning slide and the right hand is holding the tuning slide in the middle of the curved portion. Carefully pull up on the tuning slide with your right hand, being very careful to pull the slide straight up. If you happen to pull the tuning slide to the right or the left when you are removing it you can bend the tubes and make it difficult to put back on or remove in the future.
- When the tuning slide comes free you can lay the bell on its side and the tuning slide beside it, then remove the inner slide from the outer slide on the hand slide and lay them side by side along side the bell.
- Take a paper towel and wipe any grease off the inner tubes of the tuning slide, then use the towel to remove any lubrication from the inner hand slide by drawing each side of the slide through the towel while it’s held your other hand.
- Now you need a big piece of cotton cloth to clean the inside of the outer hand slide. Muslin works very well; so does an old bed sheet; the important thing is that it must be cotton; a synthetic material will not work. Tear a strip of cloth about eight inches wide and at least as long as the swab rod and preferably longer. Fold the cloth in half lengthwise and thread the folded corner through the eyelet of the swab rod and pull a small amount of cloth through. Holding the rod in your right hand with the end pointing up, hold the cloth out to the left like a flag. Twirl the rod one half turn counter-clockwise so the cloth starts to wrap around the rod. Then pull the cloth up and over the top of the rod and pull it down the other side. This should leave the end of the rod covered in cloth and the cloth should have a slight bulge to it at the tip of the rod. Pull the fabric down the side of the rod and with the round bottom of the rod planted firmly in the palm of your right hand, grasp the rod with your thumb and fingers so that the cloth is taut.
- Holding the swab rod in your right hand, grasp one side the hand slide at the cross brace. Insert the swab rod while making sure that you are keeping the fabric taut on the rod so it doesn’t bunch up. The cloth on the rod should fit snugly into the slide tube; snug enough so you have to push a little to fit it in, but not so tight you have to fight it or so loose it doesn’t grab the inside of the slide tube. If the swab is too loose, lift the cloth back over the top and twirl the rod around a little more than half a turn and that will make the head of the swab bigger. If it’s too tight then lift the cloth up and un-twirl it just a bit and that should make it fit easier.
- When you have the right “fit”, push the rod slowly all the way into the slide. Be careful when pushing the rod in that you don’t hit the palm of your right hand against the top of the slide tube at the bottom of the stroke.
- Once you’ve done one full stroke down and back do several more in rapid succession. Then change your grasp on the hand slide to the other side of the cross brace and swab the opposite slide tube in the same manner. When the end of the cloth gets dirty you can fold it in half the opposite way, and when that gets dirty as well you can tear off the end of the cloth and start with a fresh piece of fabric. (If your piece of cloth is longer than the rod, then you’ll be able to keep tearing off the end when it gets dirty and still have enough cloth to do a lot more swabbing).
- After all the old lubricant has been removed from the tuning slide and the hand slide, we can wash the trombone. Fill the tub up with lukewarm water (not hot), deep enough so that the body of the trombone can be submerged under water. Mix in some soap, just like you were going to do the dishes. First, take the mouthpiece brush and clean out the mouthpiece in the water, running the brush up the bottom, or shank end, of the mouthpiece. Rinse and set aside to dry.
- Next, immerse the body of the trombone in the water and run the flexible bore brush through the mouthpipe (sometimes called the gooseneck), the narrow tubing that leads from the mouthpiece receiver to the tuning slide on the bell. Then rinse the bell and stand it up on the flat towel so it can drain.
- Then you can immerse the outer hand slide in the tub and push the brush all the way down each slide tube. The end of the brush should actually be able to work its way around the curved hand slide crook at the bottom and start back up the other side. The hand slide crook is an important part to clean; a lot of debris can accumulate here because it’s at the bottom of the hand slide when the instrument is being played. When you’re through running the brush through the hand slide, rinse it with clear water and prop it up on the towel upside down so it can drain in a place where it’s safe and can’t be knocked over.
- Last is the inner hand slide. Submerge it in the water and run the brush all the way through each tube, rinse, and stand it up where it can safely drain.
- With everything clean, take the second towel and dry everything off. Then swab the outer hand slide out once more, making sure to use a clean piece of cloth. If the cloth comes out dirty, swab it again, until it comes out clean.
- Now we can start reassembly. Pick up the tuning slide and rub a thin coat of slide grease on each of the inner slide tubes. In some cases, one of these tubes may be on the bell part and not the slide itself. Holding the tuning slide by the curved crook, insert each tube separately and work it around to distribute the grease, then carefully put both tubes in at once. Do this slowly so you can be sure it’s going in straight and do not force it if it doesn’t go together easily. When it’s difficult to put together it’s usually because you’re not pushing the tuning slide on straight, so if this is happening look at it carefully from the side and see if all the tubes look like they are straight up and down. When the slide is in all the way take the paper towel and wipe off any excess slide grease you might see.
- There are several ways to lubricate the hand slide. This is also called dressing the slide. If you’re using oil, put the inner slide in outer slide half way and then place a few drops of oil on each inner slide tube right where it enters the outer slide. Work the hand slide back and forth a few times and you’re ready to play.
- If you’re using slide cream and a water spray bottle, coat each stocking of the inner slide with a light coat of cream. The stocking is the last six inches or so of the inner slide at the bottom; the part that is slightly larger in diameter. Then place each inner tube in its corresponding outer tube and work the inner hand slide back and forth to help distribute the cream inside the outer slide. Remove the inner hand slide and spray up and down the tubes with water from the spray bottle and then put the inner slide in the outer slide and work it back and forth again a number of times. If it feels great you’re ready to play, but it will probably feel slow and gummy. Take a paper towel and wipe both inner slides clean, then spray with water once more and try again. Repeat this process as needed until the slide feels good to you. On some trombones you have to do this once or twice and on some others you have to do it four or five times. Once you start playing, the slide might start to feel slow again after a while; just spray some more water on the inner slide tubes and it should be fine again.
- Generally speaking, oil works okay on a slide and cream works great. Yamaha recently came out with a new hand slide lubricant that is as easy to apply as oil that works even better than the best cream. You just need to squirt a small amount on each stocking, work it back and forth some, squirt some water on it, and your slide feels wonderful!
Cleaning and Polishing the Outside
- Just use a clean dry cloth to keep the outside of the instrument clean. There are lacquer polish cloths available that are okay to use which are treated with a wax that cleans and shines and won’t hurt the finish of the trombone. If you are careful, you can also spray a polish such as Pledge® lightly on a cloth and then use the cloth to polish and remove any stubborn stains on the body of the horn.
- If the instrument is silver-plated instead of brass-lacquered, you can use a silver polish cloth to keep the outside shiny. Before you polish a silver horn, especially if you haven’t given it a bath recently, take the time to wipe the outside off with a cloth lightly dampened with rubbing alcohol. This removes the oils of the perspiration from your hands and any dirt that might be on the surface and makes the actual polishing go a lot quicker.
Helpful Hints and Reminders
- Pliers and trombones don’t go together – ever! If your mouthpiece happens to get stuck for any reason, DO NOT use pliers to try to get it loose, and just as important, DO NOT let your dad try it either. Depending on how stuck it is, using the pliers can scratch and damage the mouthpiece at the very least, and in worse cases the hand slide can also be damaged.
- It happens very rarely, but if when you’re through playing you can’t separate the bell from the hand slide, if they’re stuck, under NO circumstances should you try and force them apart.
- If and when the mouthpiece gets stuck, first ask your band director for help. Most band directors have a tool called a mouthpiece puller that can remove a stuck mouthpiece quickly and easily without damaging the mouthpiece or the trombone. If the band director cannot help you, then take your trombone to your local band instrument store and ask for their help.
- When you are placing the horn back in the case do not store your band method book on top of the instrument. Most trombones and trombone cases are designed these days so that padded inside of the lid comes right down on top of the trombone, leaving no room for a book. Forcing a book to fit by pushing down on the lid to close it can damage the instrument.
- Keep your trombone safe. It should only be “on your face or in the case!” Do not leave it on your chair, the sofa, the table, the floor, or the piano. If a trombone is dropped it can cause extensive damage and expensive repair.
- Always carry your case with the lid or top side of the case toward your body. This way, if the case were to unexpectedly open for any reason, you would have the chance to pull the case against your body to prevent the instrument from falling out. If the lid is facing away from you and the case opens there is no way for you to keep the instrument from falling out.
-
Whether the information is on a card inside the case, a label or an ID tag, make sure your instrument has identification on it showing that it belongs to you. Almost all band instruments have their own unique serial number on the body of the instrument so you shouldn’t mark the instrument itself, but do have proof of ownership somewhere inside or on the case.
Rent Online Now!
Lessons
Connect with us